Monday, September 30, 2013

Lash Extensions


Lash Extensions are great way to give eyelashes volume, length, and a smooth curl.  They are also perfect for someone who just doesn't want to do their makeup each morning.  The process of lash extensions involves gluing a synthetic, curved lash to each individual natural lash.  As the natural lashes go through their regular shedding cycle, the synthetic lashes shed with the natural lash to which they are glued.  Every 2-4 weeks (depending on a person's lash cycle) more lashes will need to be added to keep the lashes full.
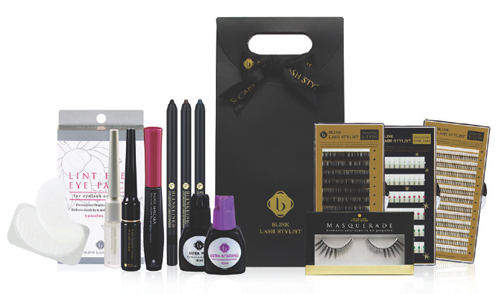
Supplies needed:
  • 2 Pairs of tweezers
  • Lint free eye patches
  • Lash primer
  • Lash brush
  • One of the following types of Glue
    • U+  - Quick dry time Acrylic-Based
    • B    - Medium dry time Acrylic-Based
    • A    - Slow dry time Acrylic-Based (usually used in training)
    • Q-1 - Medium dry time Latex-Based
  • Synthetic lashes ranging from sizes 7-15mm with one of the following curls:
    • J- Straighter lash used for severely hooded eyes.
    • B- Curls like a natural lash, used for recessed hooded eyes.
    • C- Most typical. Looks like a curled lash.
    • D- Most curly.  Only to be used on naturally curly lashes.
Always use Primer and sterile tools!

http://www.buykorea21.com/productImage/img20110928154440.jpg


You will first discuss with the client what her objectives are.  What look is she going for and why is she getting lash extensions.  You will also look at the client's lashes to see how full, curly, etc they are.  A plan should be made by taking into consideration both what the client wants, and what is possible with her natural lashes.  If she has very straight lashes, an extremely curly lash will not adhere well to her natural lashes.  If she has extremely short lashes, a 15 mm lash would put a lot of weight on the lash and possibly cause the lashes to shed quicker than normal.  Come up with a realistic shape that is acceptable for the client, and then have the client lay down with her head close to you and her chin up.


http://www.beautyhows.com/wp-content/uploads/2013/03/Eyelash-Extensions-Lifespan-Pros-Cons-and-After-Care-and-How-to-Remove-Lash-Extensions.jpg


Carefully place an eye patch under each eye to cover the bottom lashes.  Use tape to anchor pads in place or to cover any exposed bottom lashes.  Use primer to thoroughly cleanse any impurities and remove any product from the lashes.  Pour a small amount of glue on a sterile surface and pull out the sizes of lashes that will be used. 

With one set of tweezers, you will carefully separate the lashes and isolate one lash between your open tweezers.  With the other set of tweezers, you will grab one synthetic lash by the tip, and lightly dip the root in the glue.  Only a small amount of glue is needed.  Rub the bead of glue found on the root of the synthetic lash along the isolated natural lash to create a smooth and tacky surface for the lash to adhere.  Then place the synthetic lash onto the natural lash and hold until the glue is dry enough to hold the lash on its own.  The lash should be placed as close to the eyelid as possible, but with a little space to allow movement. 

Alternate sides to allow glue to dry well.  Also alternate the sizes you use to create a more natural looking lash.  For example, if you are primarily using a 12mm lash, add a few 11mm lashes to create a natural looking blend.  Shorter lashes are ideal for the inside corners near the nose so that the lashes don't poke the eyelid or put too much weight on the short lashes.

When each lash has been properly glued and aligned, check to make sure no lashes are sticking together or to the pad.  If two lashes are glued together, one will begin to tug on the other as they grow and will cause pain or other more serious problems.  Once you have checked to make sure the lashes are separated and straight, remove the pads and have the client sit up and THEN open their eyes slowly.


Instruct the client on proper care and maintenance of her lashes, and set up an appointment for a fill if possible. Your client will now enjoy full, long and beautiful lashes, without the hassle of mascara and curlers!

Friday, September 27, 2013

Chapter 4: Infection Control

1.  MSDS stands for Material Safety Data Sheet.  It is information compiled by the manufacturer about its product.  It includes ingredients and storage requirements.

2.  Bacteria are one-celled microorganisms with both plant and animal characteristics; also known as microbes.

3.  The two main classifications of bacteria are nonpathogenic and pathogenic. 

Nonpathogenic bacteria do not cause disease (they help the body breakdown food and protect against infection). 
Pathogenic bacteria may cause disease or infection when they invade the body.

4.  The three forms of pathogenic bacteria are:
  1. Cocci are round-shaped bacteria that appear either singly or in groups (Staphylococci, Streptococci, and Diplococci)
  2. Bacilli are short, rod-shaped bacteria.  They are the most common bacteria and produce diseases such as tetanus, typhoid fever, etc.
  3. Spirilla are spiral or corkscrew-shaped bacteria.
5.  Viruses are different from bacteria because they may only live by penetrating cells and becoming part of them, whereas bacteria may live on their own.

6.  AIDS affects the body by breaking down the immune system.  HIV is spread through blood and other body fluids such as semen and vaginal secretions.  It is not spread by holding hands, kissing, sharing food, or sitting on toilet seats.

7.  A contagious or communicable disease is a disease that is spread or transmitted by contact.

8.  The difference between local and general infection is that a local infection is confined to a particular part of the body, and a general infection is carried in the bloodstream to all parts of the body.

9.  Immunity is the ability of the body to resist disease and prevent infection. 
Natural Immunity is an inherited resistance to disease. 
Acquired immunity is developed after the body overcomes a disease, or through inoculation (such as vaccination).

10.  Decontamination is the removal of pathogens and other substances from tools and surfaces.  The three levels are:
  1. Sanitation- to significantly reduce the number of pathogens or disease-producing organisms found on a surface.
  2. Disinfection- to kill most microorganisms on hard, nonporous surfaces.
  3. Sterilization- to kill all microorganisms, including bacterial.
11.  Three types of disinfectants are:
  1. Quaternary ammonium compounds (quats)- non-toxic, odorless, and fast acting used to disinfect implements usually in 10-15 min.
  2. Phenol- caustic poison that can be safe and effective in disinfecting implements.  It may soften or discolor most rubber and plastic.
  3. Ethyl and Isopropyl alcohol- The strength must be 70% or higher for Ethyl, and at least 99% for alcohol.  Not always legal.
12.  These items may be disinfected in the following ways:
  1. Nonporous implements- Put on gloves and goggles, mix disinfectant (according to directions and adding disinfectant to the water), pre-clean with soap and water, rinse thoroughly and pat dry with clean towel, completely immerse, leave for required time, remove with clean tongs, rinse thoroughly and dry.
  2. Linens- Store in a closed, lined receptacle and wash with bleach.
  3. Electrical tools that cannot be immersed- wipe or spray with an EPA-registered, hospital-grade disinfectant created especially for electrical equipment.
  4. Work surfaces- Before and after performing services on each client, an EPA-registered, hospital-grade disinfectant should be used and left on for directed time.
13.  Six precautions to follow when using disinfectants include:
  1. Always follow manufacturer's recommendations for mixing and using.
  2. Always wear gloves and safety glasses when mixing chemicals with water.
  3. Always add disinfectant to water, not water to disinfectant.
  4. Use tongs, gloves, or a draining basket to remove implements.
  5. Never pour quats, phenol, alcohol, or any other disinfectant over your hands.
  6. Never place any disinfectant or other product in an unmarked container.
14.  To take care of an exposure incident:
  1. Stop the service
  2. Wear gloves
  3. Clean the injured area with an antiseptic
  4. Bandage the cut with an adhesive bandage
  5. Clean your workstation
  6. Discard contaminated objects by double-bagging and using a biohazard sticker
  7. Disinfect tools and implements
  8. Remove your gloves, and wash hands
15.  Universal Precautions are a set of guidelines and controls, published by OSHA, that require the employer and the employee to assume that all human blood and specified human body fluids are infectious for HIV, hepatitis B virus, and other bloodborne pathogens.

Friday, September 13, 2013

Chapter 3: Communicating for Success

1.  The Golden Rules of human relations are:
  • Communicate from your heart; solve problems from your head.
  • A smile is worth a million times more than a sneer.
  • Be kind to others. Treat people in a way that allows them to maintain their dignity.
  • Every action brings about a reaction.
  • Learn to ask for help when you are overwhelmed.
  • Show people you care by listening to them and trying to understand their point of view.
  • Give compliments freely.  An encouraging word at the right moment brings out the best in people.
  • Being right is different from acting righteous.
  • Balance your service to others with personal time to renew your own mind, body, and spirit.
  • Laugh often.
  • Show patience with other people's flaws.
  • Take time to evaluate your own attitude and actions.
  • Make amends when you are wrong.
  • Learn to forgive yourself and others.
  • Be compassionate toward others, demonstrating your support in difficult times.
  • Build shared goals; be a team player and partner to your clients.
  • A simple thank-you goes a long way in showing your appreciation to clients and colleagues.
  • Remember that listening is the best relationship builder.
2.  Communication is the act of successfully sharing information between two people, or groups of people, so that it is effectively understood.

3.  The ten elements of successful client consultation are:
  1. Review- Review the intake form and develop rapport with you client.
  2. Assess: Assess your client's goals and objectives.
  3. Preference- Ask the client what products and services she has done and what she thinks of them. What is the reason for today's visit?
  4. Analyze- Assess the client's skin type, texture, and any skin conditions.
  5. Lifestyle- Ask your client about her career and lifestyle.
  6. Show and tell- Review the various treatment options, and then use reflective listening to make sure you and the client both know what is going to happen.
  7. Suggest- Narrow the treatment options based on lifestyle, skin type, skin conditions, and Fitzpatrick typing. Tactfully discuss any unreasonable expectations and suggest any other helpful services.
  8. Sun exposure- give instructions regarding proper skin care with every client.  Make sure to advise clients who have exfoliating treatments to keep out of the sun.
  9. Maintenance- Counsel every client on proper skin care, regular salon treatments, lifestyle limitations, and home maintenance.
  10. Repeat- Reiterate everything that you have agreed upon.
5. Record things on the client's consultation for such as the client's reactions, anything you did and want to do again, and final results.

6.   To handle tardy clients make sure you know your salon's late policy.  If you can take the client, make sure you politely let them know that it is not acceptable to be late, but you can help them this time. If a client is habitually late, tell them an earlier time to come.

7.  To handle a scheduling mix-up make sure to be polite and don't argue about who is correct.Make another appointment for the client for as soon as possible.

8. To handle an unhappy client, first find out why the client is unhappy, then make an appointment to fix the problem as soon as possible.  If it is not possible to fix the problem, you may have to defer to the salon manager.

9. When communicating with Coworkers, it is important to remember:
  • Treat everyone with respect
  • Remain objective and neutral
  • Be honest and sensitive
  • Keep your private life private
  • Do not take things personally
10.  When communicating with a Salon Manager, it is important to remember:
  • Be a problem solver
  • Get your facts straight
  • Be open and honest
  • Do not gossip or complain about coworkers
  • Check your attitude
  • Be open to constructive criticism